Getting a new roof can be an exciting process for homeowners, but also one that you may not be that familiar with. And you want to be sure you’re getting the full benefits from this important investment in your home’s structure. So as you prepare for a roof replacement, it helps to know exactly what your roofer will do for you.
Here’s what happens when a trusted roofing contractor replaces your roof.
9 Steps of a Reliable Roof Replacement
1. Choosing Your Roofing Materials
Before your roof installation begins, you’ll have some decisions to make. The good news is, an expert roofing team like ours can walk you through all the options that make sense for your goals, architecture and budget. From asphalt and polymer roofing shingles to tile and stone-coated steel, you have a variety of materials, styles and colors to choose from. Expect your roofer to order the materials and arrange to have them safely delivered.2. Setting Up the Work Area
When the day of your roof installation arrives, your roofer will show up to begin work. You’ll likely have received some roof installation preparation instructions ahead of time (like removing outdoor furnishings, covering up landscaping with tarps, and keeping your pets safely indoors). Feel free to ask if you have questions about how to prepare.3. Removing Old Roofing
The roof installation begins with removing the old roofing. This part of the job should be done thoroughly, without cutting corners. Top-notch roofers will pry up the old shingles or panels, remove aging flashing, and discard it in a dumpster or garbage cans.4. Inspecting and Making Repairs
In some cases, especially if you have had storm damage or a roof leak, you may need repairs to the structure of your home before the new roof is installed. You can expect your roofer to check the sheathing (the support system that holds up your roof). If repairs are needed, they’ll be made at this stage.5. Placing Underlayment
To help your roof stay free of moisture intrusion, a layer of protective material (known as underlayment) is attached to your roofing structure. This self-sticking element is attached as flat and straight as possible to your roof deck. Felt or tar paper is then stapled on for even more moisture protection.6. Installing the Roof Cover
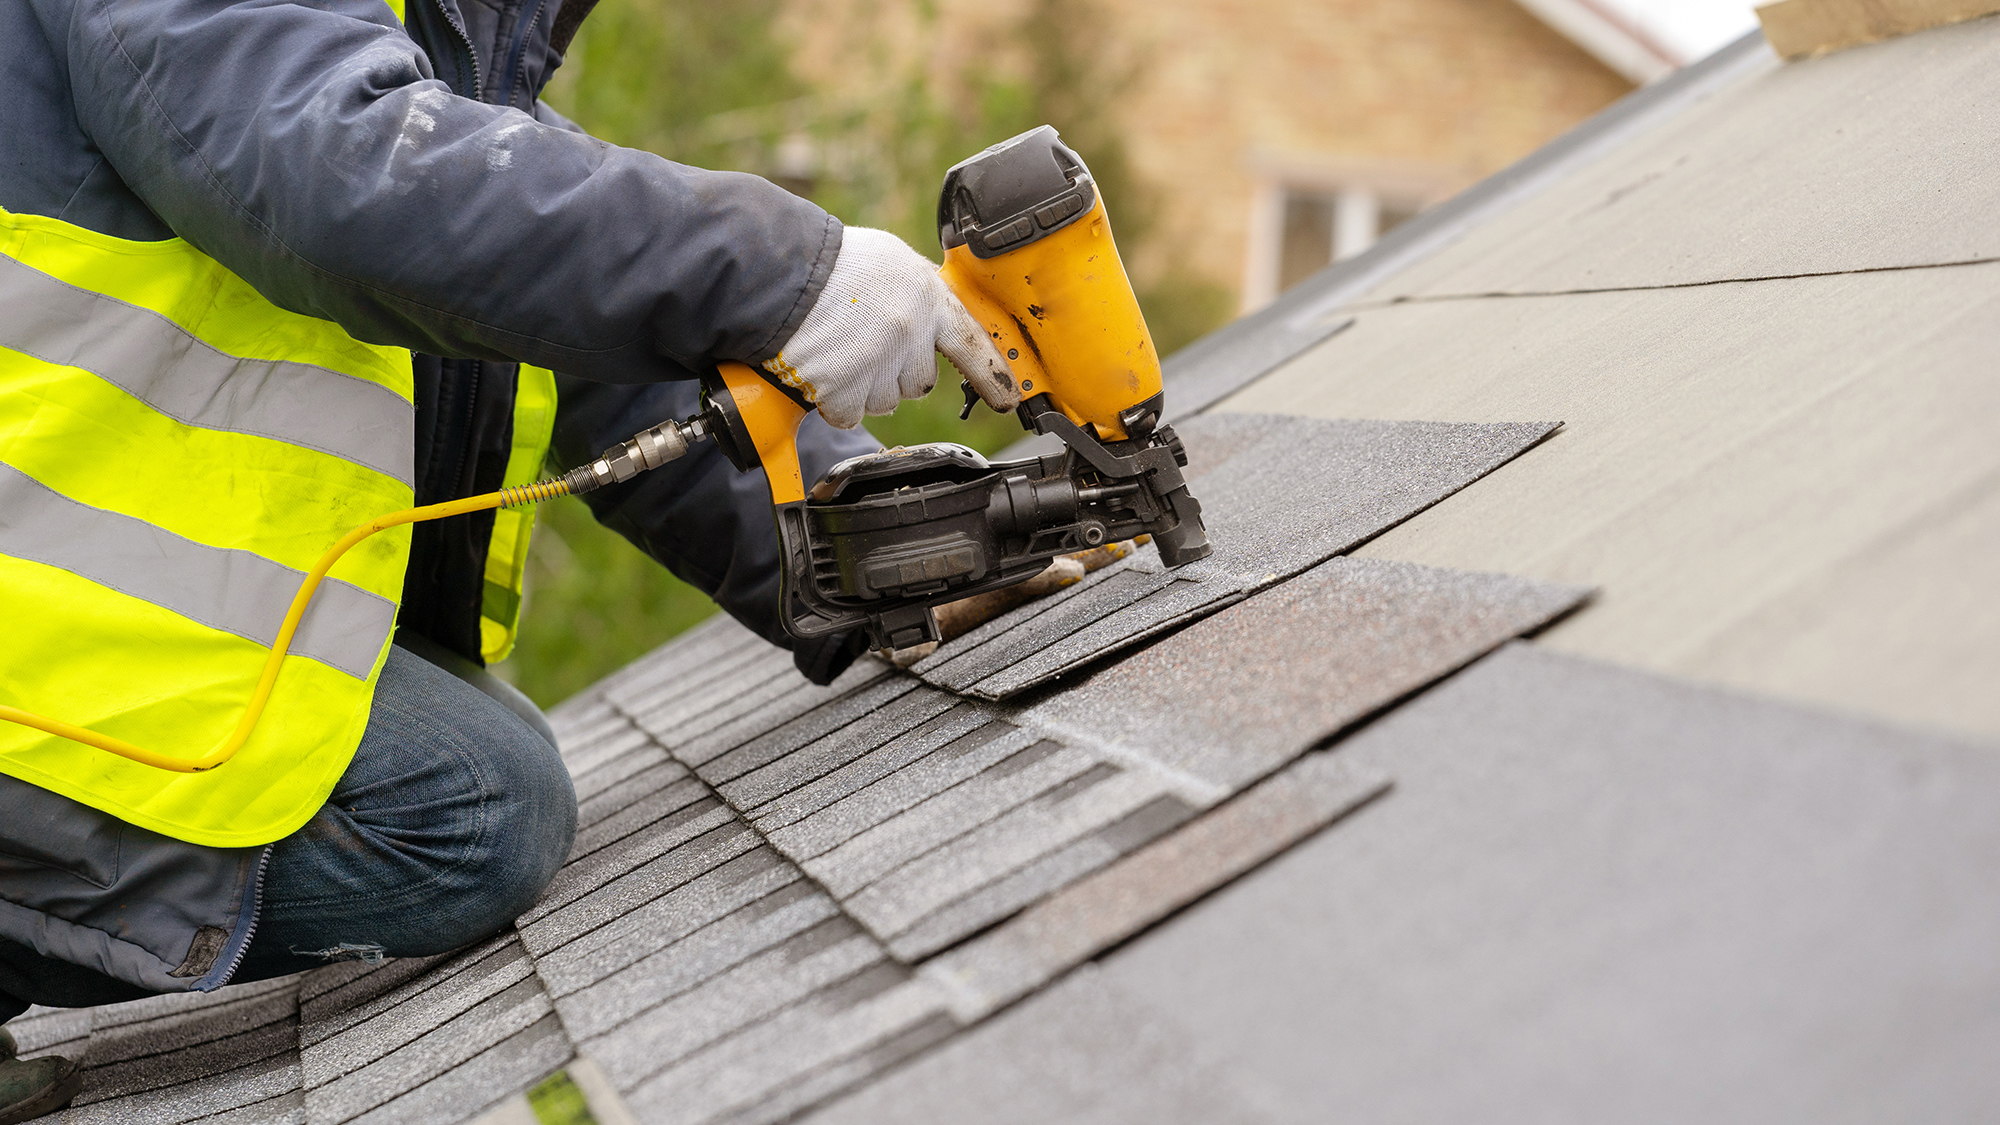
Once all these other preparatory steps are completed, the element of the roofing that will be visible to everyone is set into place. If you’ve chosen asphalt shingles, they’ll be added in layers, staggered, and nailed. If you’ve chosen metal, the panels are screwed in. Either way, a top-tier roofer will do this stage with careful precision so your new roof looks beautiful and keeps your home protected.7. Adding Flashing
Flashing is a metal material that is installed around chimneys, windows, joints and similar spots to keep water from sneaking in at those otherwise vulnerable spots.8. Capping the Ridge
In this final step, additional protection is added to the ridge (the top peak) of your roof. Specialty materials are used for this purpose.9. Cleaning Up
At the end of your installation process, your roofer will ensure all the old roofing material is safely discarded, and will go over your lawn to pick up nails and other debris. You’ll be ready to enjoy your gorgeous new roof!Get Peace of Mind with a New Roof Installed by Our Experienced Kansas City Team
When you’re ready for a new roof, give yourself the peace of mind you deserve by turning to a local team with proven expertise and top-notch customer service. At Kansas City’s Smart Exteriors, we install superior roofing materials that give you lasting performance, and we’re proud to have been named one of the Top 20 Roofers in Independence by Expertise, with an A+ rating. We’re here to make your roof its very best. Contact us today to get started on your roofing installation plans.Want to learn more about your Kansas City home's roof?
Our "Roofing Guide for Kansas City Homeowners" is a great place to start